Note: The links marked with an asterisk (*) are so-called affiliate links. If you click on such an affiliate link and buy through this link, I get a commission from the respective provider. For you the price does not change.
You want to build your own website with Divi but you have no idea how to get started? Well, great that you found your way here!
In this step-by-step Divi tutorial, I’ll show you a simple way to proceed in order to get started building your own Divi website – right from the start.
You are new to this blog? Then let me tell you a little bit about me first.
Hi, I’m Tobias – self-employed web designer, owner of B&F Webdesign Studio and founder of Divitorials.
My goal is to help you build your own Divi website – as efficiently and target-oriented as possible.
Why?
Because I know that – especially as a beginner – building your own website with WordPress and Divi without any guidance can be a time-consuming challenge. I speak from my own experience …
Just as you probably do now, I started with WordPress and Divi a couple of years ago because I wanted to build my first own WordPress website.
However, I quickly realized that it’s not easy at all if you don’t know where to start.
I didn’t know which hosting was the right one for my Divi website, how to install WordPress, what a child theme is, where to upload my logo or how the Divi visual builder works.
If you also have big question marks buzzing around in your head due to topics like these, this article is probably right for you.
In this step by step Divi tutorial, I’m going to show you how you can build your own Divi website from scratch, even as a beginner without any WordPress or Divi experience.
Ready to get started? Let’s go!
Step #1: Registering your domain & setting up your hosting
Before you can start building your website, the first thing you need is a domain and a hosting package.
A domain is the web address at which your website will be accessible on the Internet. You need a hosting so that you can upload the files of your website to a server. On that basis, people can later access your website via their browser.
In order for your website to load quickly, it is very important to set the right course right from the start and choose a hosting provider that allows a fast website loading time.
After all, there is nothing more annoying for your website visitors than having to wait forever until your website is loaded. The bad thing is that they probably won’t wait and leave before you have the chance to convince them of you and of what you offer.
Moreover, with a fast website you create the basis for a good ranking on Google – which that can be crucial for the later success of your website.
As a web designer, I have already tried out several hosting providers.
From slow loading times to unintuitive member areas and poor customer service, I’ve actually experienced everything across the board.
That’s frustrating and can be quite annoying!
What I have also often experienced is that my customers had already purchased a hosting package before hiring me. Most of the time they could have chosen much better and cheaper for their actual hosting needs. Their hosting was way too extensive for their purposes and therefore way too expensive.
But it doesn’t have to be like this! A good hosting package should not cost you more than 12$ per month in the beginning.
The following requirements should be met by a good hosting package:
- Fast loading time
- At least 1 or more domains included
- 2 or more SSD databases included
- At least 20GB webspace
- 5 or more email accounts included
- SSL certificate should be included for free
A well known American hosting provider that fits these requirements and that is also recommended by WordPress is Bluehost*.

Bluehost convinces through fast loading times, their 24/7 customer service and a very good price-performance ratio.
Since I am from Germany I, of course, host all my websites with a German hosting provider (webgo*). This might not be suitable for you if you host your domain from a country outside of Germany but I did some research and found that Bluehost gets a lot of very good feedback in the United States.
This is how easy you can book your Bluehost hosting package:
You start by going to the Bluehost website* where you can find the different pricing options.
You need to scroll down a little until you see the pricing options:

Now you choose the pricing option that fits best for you by clicking “Select”.
Probably the BASIC package is absolutely fine for you if you just want to host 1 single website in the beginning.
In the next step, you can now create a domain name (in case you do not have one yet) or you can go on using a domain name you already own:
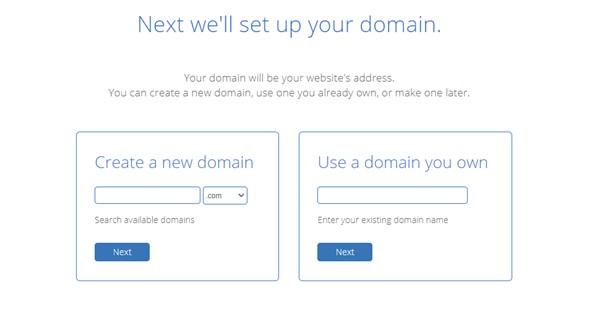
You do not have a domain name yet or you do not want to choose one now? That is absolutely fine, you can also skip this step and choose a domain name later on:

You have no idea what a domain name is? No problem either. Let me explain it to you briefly: The domain is basically the web address that people use to go to your website. In my case that would be www.divitorials.com. So, I would have picked “divitorials” as my domain name here.
Now you get to the next step where you can start creating your account by filling in some account information (your name, address, email address):

When you scroll down a little you are asked to choose your account plan (12 months, 24 months, 36 months):

The plan length you choose is up to you.
Note: Choosing the 36 months plan you get the lowest price per month on average.
Now you can scroll down some more and you get to the Package Extras. Here you can select some add-ons if you like:

My recommendation: Uncheck all boxes except for “Domain Privacy + Protection”.
Why do I recommend “Domain Privacy + Protection”? If you do not book this extra, your account information (what you have just filled in above) might be publicly accessible on the internet. That means that people will see who is the owner of the domain and might contact you for promotional or spam purposes.
You cannot see this box? The reason is that you haven’t chosen a domain name yet. In this case you can book the privacy protection later when you will have registered your domain.
Last but not least you still have to fill in your credit card information and agree to the Bluehost terms and privacy notice. In case you do not want to receive emails about Bluehost products, services or special offers you can also check the corresponding box.
Then you just have to submit and you are done!

And that’s it! Now, you are the proud owner of your own hosting and domain!
That means that you mastered the first step to your own Divi website. ?
In the next step of this Divi tutorial I will show you how to install WordPress.
Step #2: Installing WordPress
The basis for any Divi website is the CMS WordPress.

WordPress is the main system with which you manage the pages and content of your website.
Divi is the system you will use to control the look and feel of your website.
If you have followed step #1 of this Divi tutorial and set up your hosting at bluehost, you can now easily install WordPress using the so-called 1 click installer.
Note: If you are using a different hosting, you can check whether your hosting provider also offers a 1-click installer for WordPress (for some hosters this is the standard nowadays).
However, if the 1-click installer is not available to you, you can download WordPress here for free and then you have to install it manually. You will certainly find a suitable guide on the website of your hosting provider.
Using the 1-click installer that Bluehost offers you literally just have to make one click and WordPress will be set up for you automatically.
Afterwards, you can just log in to your WordPress website via the link yourdomain.com/wp-admin/ with your username and password. Of course, you replace yourdomain.com with your own domain ?.
And done! WordPress is ready to go!
? Pro Tip: Once you’ve installed WordPress, your site is basically accessible on the internet (as long as people have the direct link to your site).
If you don’t want people to be able to access your website while you are still building it, you should definitely install a maintenance plugin.
This will show a “building in process” page to any visitor who uses the link to your website but is not logged into WordPress.
I use the free plugin WP Maintenance Mode by Designmodo for this. You can simply search for the plugin directly in WordPress under “Plugins” and install it from there.
In the next step of this Divi tutorial we will install the Divi Theme.
Step #3: Buy, download & install the WordPress Divi Theme
If you haven’t already done so yet, now it’s time to buy Divi.

1. Buying Divi
In case you are not sure if Divi is the right theme for you, you can also read my article Buying the Divi Theme – Info & tips before buying (10% discount) and then come back here.
Once you have purchased the Divi theme, you can download Divi from your Elegant Themes customer login. Read on to learn how to download it.
2. Downloading Divi
To download Divi just login to Elegant Themes with your credentials and click on the Download the Divi Theme button on the first page Product Downloads.
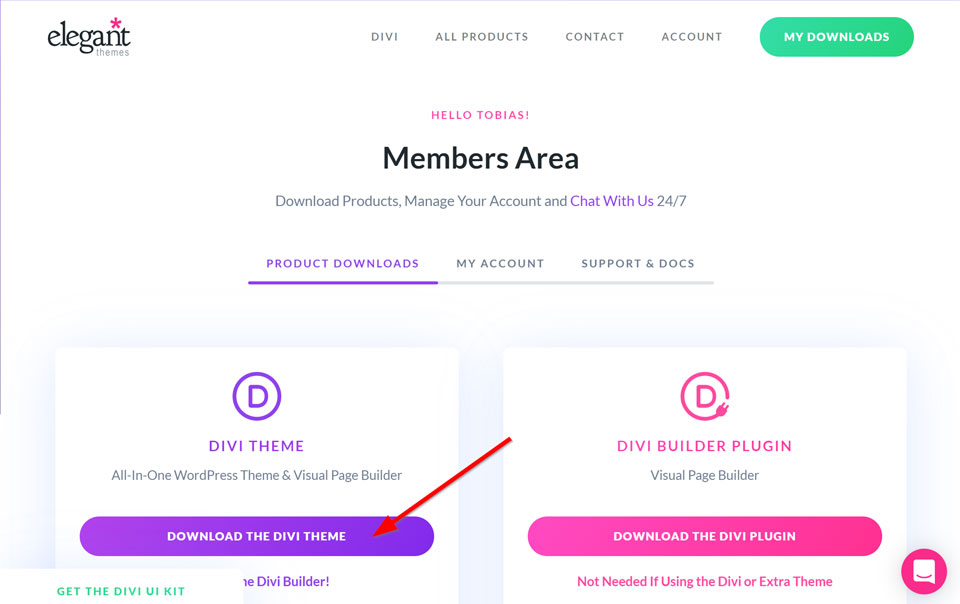
The Divi Theme will then be downloaded as a ZIP file.
After that you can install Divi in your WordPress system.
3. Installing Divi
To install Divi, login to your WordPress website and click Appearance > Themes in the WordPress menu.

Then click Add New > Upload Theme and select the ZIP file you downloaded before.

Click Install Now and Divi will be installed.

Finally, just activate Divi and you’re done!
The Divi theme is now ready to be used on your website!
In the next step of this Divi tutorial I will show you how to install a Divi Child Theme on your WordPress website.
Step #4: Installing a Divi Child Theme
If you’re new to the WordPress world, sooner or later you’ll hear about it: The Child Theme.

A child theme basically is an extension to your main Divi theme which allows you to make changes to Divi that go beyond Divi’s default settings.
For example, you can override the Divi code where needed to change the look of your website or add additional features that are NOT available by default in Divi.
If you haven’t built a website with Divi yet, you might be wondering if you really need such a child theme?
My recommendation is to always install a child theme right from the start because you never know if you might want to make changes to your website later for which you then need the child theme.
My recommendation is to always install a child theme right from the start because you never know if you might want to make changes to your website later for which you then need the child theme.
If you have already started building your website, it can be more complicated to integrate a child theme later on.
It is still possible, but more cumbersome.
That’s why it is better to include it right from the start.
Where do you get a child theme from?
Unfortunately, Elegant Themes does not offer a Divi-Child theme for download. So you would have to build it yourself.
To save you that trouble, I’ve put together a child theme that is ready to use as the perfect base for your Divi website. You just need to download and install it.
Once you’ve downloaded the child theme you can simply upload it to Appearance > Themes and then install and activate it – just as you did with the Divi theme itself.
The important thing is that you actually activate it.
This may seem a little strange, at least it did to me, because it feels like you are ONLY using the child theme when you activate it and like you are deactivating Divi. But that is not the case. By activating the Child theme after activating Divi, they actually complement each other from now on.
WordPress then uses Divi as the main theme and the child theme as the active theme.
Up to this point, you fulfilled all technical requirements to build your Divi website.
In the next step of this Divi tutorial you will learn how to get started with the actual implementation of your website.
Step #5: Creating the basic concept
As with any project, it’s a good idea to have a plan before you get down to work. This is the same for creating a website.
Without a plan, you may end up having to make unforeseen changes in the middle of your web project that cost you time and effort.
To avoid this, I recommend that you first create a basic concept.
When you have a good basic concept, you can later derive from it how the layout of the individual pages of your website should look like.
When creating a basic concept, you should first think about what the goal of each page of your website is, what content you want to place on the page to achieve this goal, and how you can arrange your content in a useful and appealing way.
Then, you can simply outline the basic concept on a piece of paper.
This is a very uncomplicated and quick way to get your concept done. Moreover, building your website will work much faster later on, because you do not have to think about the structure of the website anymore while building. You did that already and then you concentrate on the building process itself.
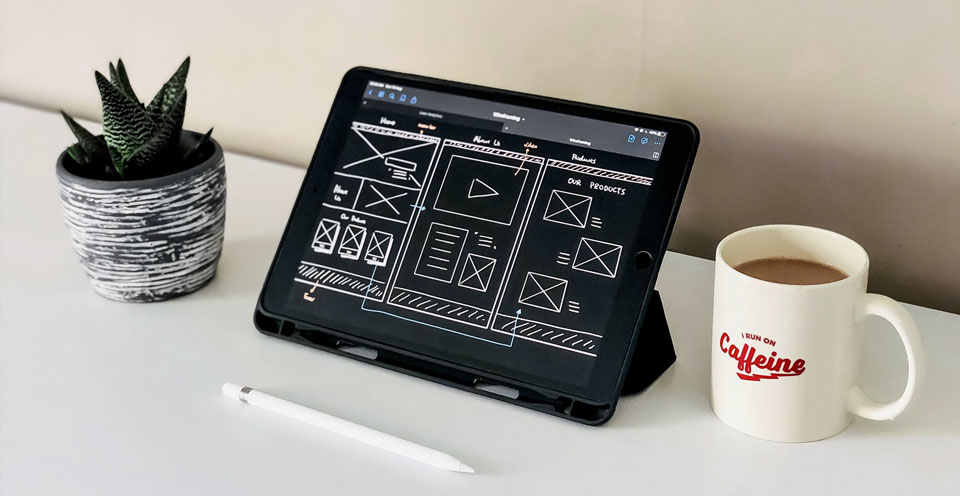
Make sure that you do not go into too much detail.
When I create a basic concept, I usually just roughly outline the elements of the website. Images, for example, are just indicated as crossed-out block elements, texts as lines.
Doing it this way you already get a feeling of the look but you can still move forward quickly.
You can imagine a basic concept like this:

Keep in mind that at this point it’s only about defining a rough structure for your website. You should not spend too much time on the basic concept. The details will follow later.
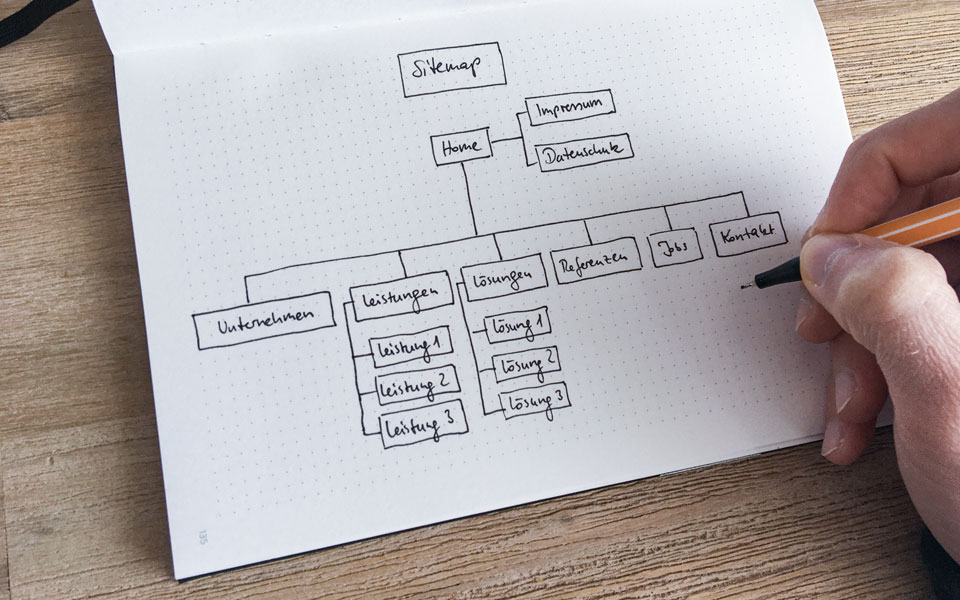
In case you are planning a website with several subpages, you can also create a sitemap in addition to the basic concept.
A sitemap is a diagram in which all pages of your website are listed clearly and hierarchically.
This helps you to make sure that you included all needed pages and that you didn’t forget one. Moreover, a sitemap helps you understand whether all pages are easily accessible for your visitors without anyone getting lost on your website.
The sitemap can be easily outlined on a piece of paper just as the basic concept.
This is how a sitemap for a small website might look like:
Once your basic concept – and your sitemap if needed – is in place, you can start building your website in WordPress.
What’s next?
In the next step of this Divi tutorial I’ll show you how to create your first pages and your navigation menus in WordPress.
Step #6: Creating WordPress pages & menus
It is important to start by building the rough structure of your website. Therefore, you create ALL pages of your website in WordPress first.
The good thing is: You have already defined them in your sitemap in the previous step ?.
Once you created the pages, you start creating the menus. The pages of your website will then be accessible via the menus and you can click back and forth between the pages of your website.
But more about that in a second …
Creating WordPress pages
To create your pages in WordPress, go to Pages in the WordPress menu and then click Add New at the top.

Then a new page will open. There you enter the title of your page and click the publish button on the right.

Your page will be published. This state of being “published” makes it possible for you to add the pages to your menus later.
Important: If you do not publish the page and only save it as a draft, you will not be able to select the page later to add it to your menus. Therefore, you should publish the page in any case. If you don’t want your pages to be publicly visible on the web already, you can use a plugin like WP Maintenance Mode, as I already mentioned before.
Once your first page of your website is created, you can repeat this process until all the pages of your website are created.
Afterwards you can start creating the main navigation menu of your website …
Creating the main menu
To do this, go to Appearance > Menus in the WordPress system and click on the link create a new menu.
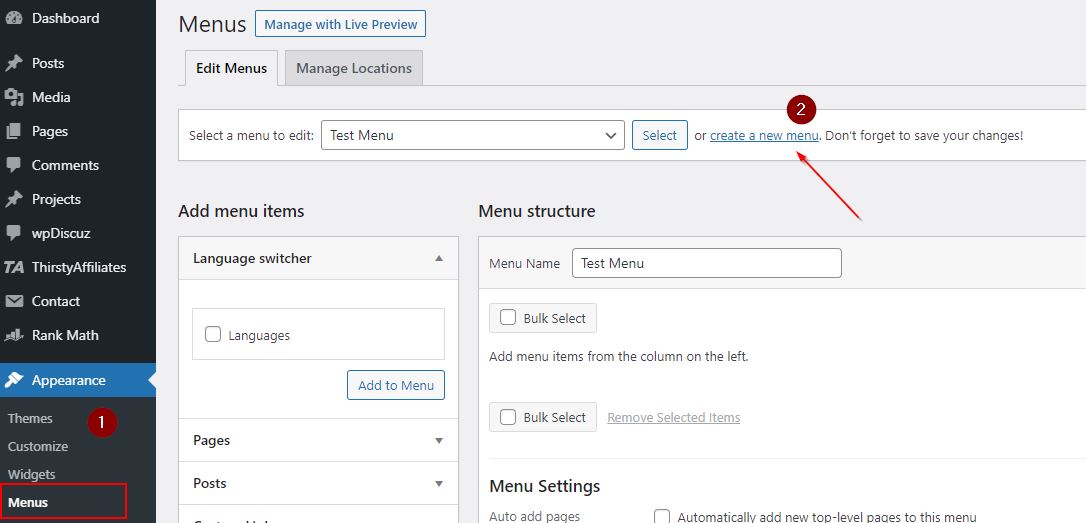
Now enter “Primary Menu” as the menu name and check Primary Menu in the menu settings.
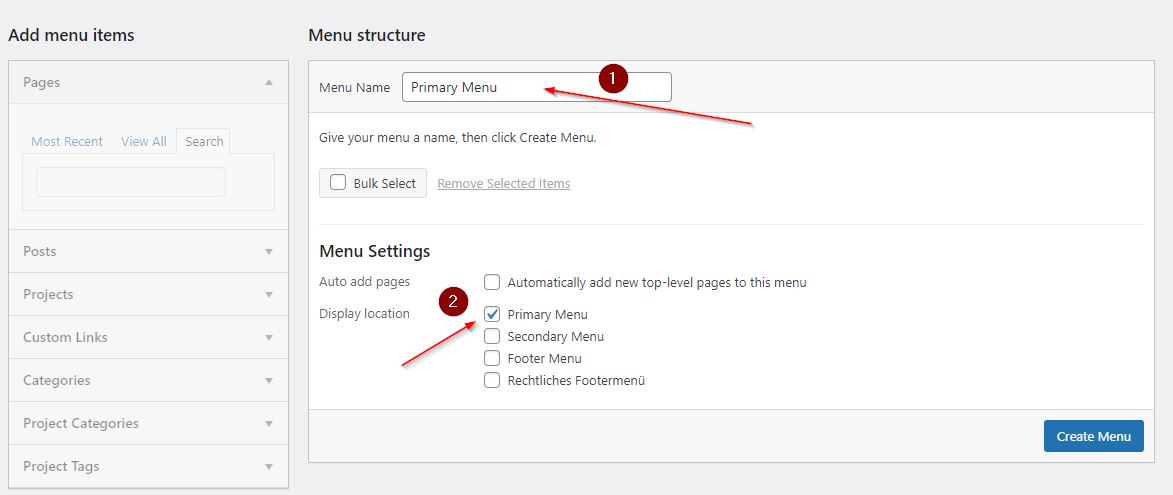
By checking Primary Menu in the menu settings you make sure that your menu is displayed as the main navigation menu on your website.
Before you can add the pages that you have just created to your menu, you must first save the menu.
To do this, click on the Create Menu button:

Then you can select the pages you want to add to your main menu from the Add menu items section and then click the Add to Menu button.

The pages will be automatically added to your menu.
Don’t forget to save!
Now your main menu is created!
If everything worked out fine, you should now be able to see your main menu on your website.
You can create other menus like the legal menu of your website, for example, just the same way as you just created the main menu.
In the next step of this Divi tutorial I will show you how to upload your own logo to Divi.
Step #7: Uploading your logo
Of course, a professional website always includes a logo …
When you add your logo to your website, it feels like your own website!
With Divi, it’s super easy to integrate your logo on your website.
However, the position where you can put the logo is a bit hidden.
Uploading the Logo
In the WordPress menu you go to Divi > Theme Options > General. There you can upload your logo as the first item in the media library and set it as your logo.
![]()
Positioning the logo
Thanks to the different menu layouts in Divi, you can position your logo as well as your main menu in as you like in your website header: Either left, centered or centered above the navigation. To do so you use the Divi Theme Customizer.
Just click Divi > Theme Customizer in the WordPress menu.
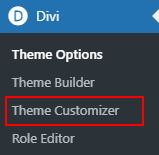
Then click Header & Navigation and open the “Header Format” section:


There you have different options to position your logo.

? Tip: Unfortunately, there is no option in Divi to position the logo on the right of the main menu. If you want to position your logo on the right, you can use my code snippet. You just integrate the snippet in the CSS file of your child theme.
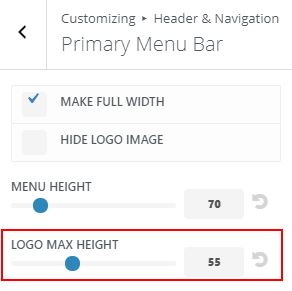
Going back in the menu, you can also resize your logo in the “Primary Menu Bar” section.
Creating your own logo with Canva
If you’re just starting out and you don’t have your own logo yet, you can easily create one yourself for free with Canva*.
How do you do this? You simply create a free account and you can start creating your logo right away.
![]()
The great thing about Canva is that you can simply choose a template that best suits your business and then customize it as you like.
With drag-and-drop, you can easily create a great logo for your business and your website in no time, even without design skills.
Tip: There are free templates and premium templates, which can only be distinguished if you take a closer look. The free templates are indicated by a small “free” notice when hovering over the template preview. If you are using a premium template to design your logo, you need to create a Canva Pro account*.
In the next step of this Divi tutorial, I’ll show you how to install a pre-made Divi layout on your website.
Step #8: Choosing and installing a suitable Divi layout
When you create your website with WordPress and Divi, you don’t have to start from scratch.
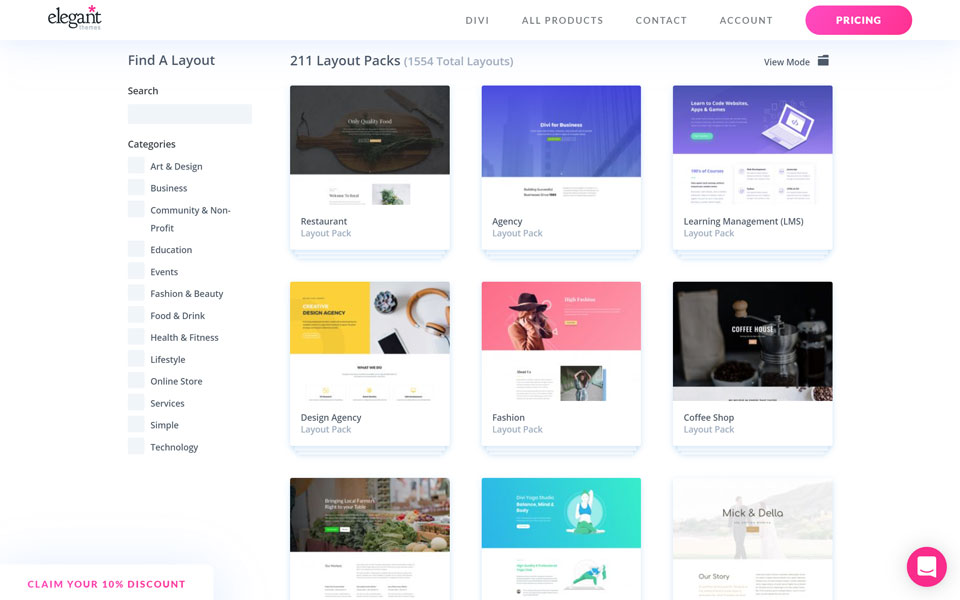
Elegant Themes offers around 211 pre-built layout packs (and more being added every month), from which you can easily choose a suitable layout for your business area and use it as a base for building your website.
On this basis, you can then customize the colors, fonts and layout yourself with Divi.
This saves you an incredible amount of time!
Here you can get an overview of all Divi layouts.
There are 13 categories to choose from:
- Art & Design
- Business
- Community & Nonprofit
- Education
- Events
- Fashion & Beauty
- Food & Drink
- Health & Fitness
- Lifestyle
- Online Store
- Services
- Simple
- Technology
When you find a layout you like, you can easily install it into Divi with just a few clicks. Here is how to do that …
Installing a Divi Layout
Open one of your newly created WordPress pages in the backend and start the Divi Builder:
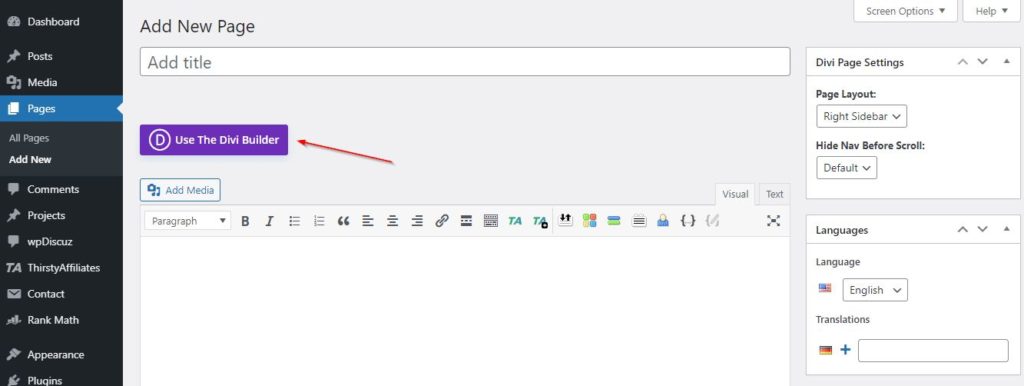
A selection menu with 3 options will open. Click on “Choose a premade layout”.

You will then be taken directly to the premade layouts:

Now select your desired layout pack by clicking on it.
The layout detailed view will open. On the right you see all layouts that are available in this layout pack:

There you choose the layout for your corresponding subpage.
For example, if you want to build a contact page, select the Contact layout.
When you click on View Live Demo, you can preview the layout before finally installing it.

Clicking the Use This Layout button will automatically install the layout for this page.
To use a further layout for another page of your WordPress website, simply repeat this process with the corresponding page.
Once the layout is installed, you can use the Visual Builder to easily customize the content and styles as you like and move, remove or duplicate areas.
There are no limits to what you can do. More about this in step #9.
The great thing is that all layouts are also already optimized for mobile devices. So, using a premade Divi layout also means that you can save the work for mobile optimization.
There will probably still be some customizations needed here and there, but you don’t have to start completely from scratch.
Do I have to choose a premade layout?
No, of course not.
If you don’t want to use a premade layout, or you can’t find a suitable layout for your industry, you can as well start with a blank canvas and build your Divi website from scratch.
This is entirely up to you.
In the next step of this Divi tutorial, I will now show you how to build the pages of your Divi website using the Visual Builder.
Step #9: Building the pages of your website with the Visual Builder
Whether you’re using a pre-built Divi layout, or you’re starting your website design from scratch, now is the time to build your website pages with the Visual Builder.

To do this, open the preview of any page of your website (Hover to open the selection bar. Then click on “View”:

The preview of the page will now open and you can click the Enable Visual Builder button in the toolbar:

The Divi builder opens and you can start building your page.
How does page building with the Divi Builder work?
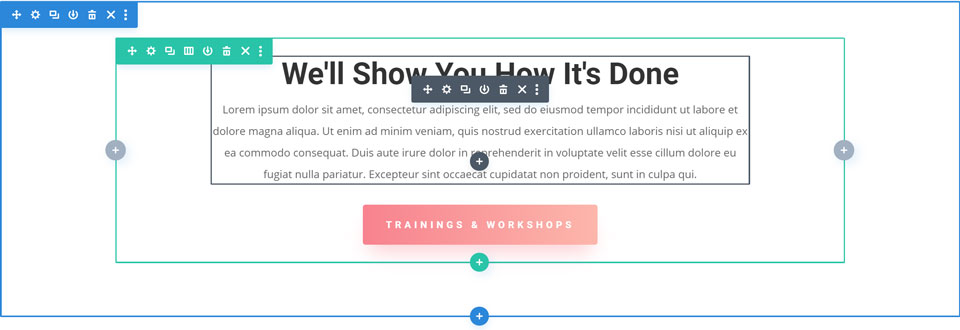
To build your website, the Divi Builder basically provides you with 3 different layout and content elements. Each serves a specific function:
- Sections (blue)
- Rows (turquoise)
- Modules (grey)
Here is an example of a section with a row and two modules in the frontend view:
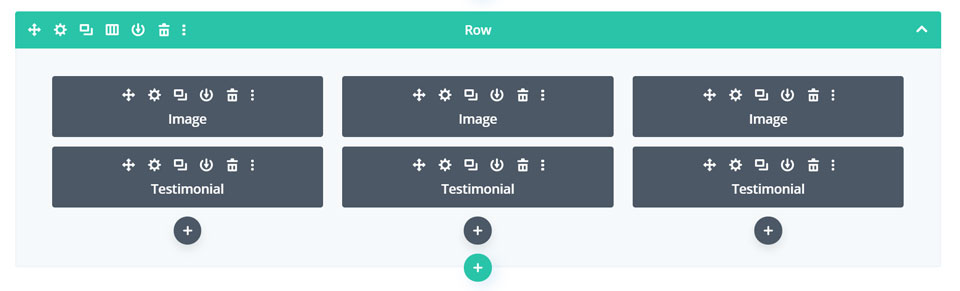
Here the same example again in the grid layout view:

1. Sections (outer container)
When building your website, you start with the so-called section, the outer container (blue color).
The section defines the rough structure of your website.
For each content area of your website (e.g. header, intro text, service area, blog area, contact area) you should use a separate section.
You can add a background video, a background color or a background image to each section to visually separate them.
You can place as many sections as you like below each other, depending on how many areas you want to show on your page.
In the section you can then integrate the so-called row, the inner container.
2. Rows and columns
The row (turquoise) or “inner container” is used to divide your section – which always takes up the full width of your screen – into multiple, vertical columns.
Like this for example:
This allows you to create individual and appealing column layouts.
Divi offers a variety of pre-designed grids, so you can divide your row into two, three, or four evenly spaced columns with just one click.

You can then add content elements, called modules, to each column.
3. Modules
A module (gray) is the smallest building block of a Divi website.
Divi now offers over 40 different modules that you can use to build your website.
These include text modules, buttons, sliders, image modules, galleries, contact forms, price tables, accordions, videos and many more.
![]()
Each module can be fully customized in terms of content and appearance.
Section, row and module settings
All sections, rows and modules can be customized.
You can access the settings as follows: If you move the mouse over a page element, a small icon menu appears in the upper left corner:
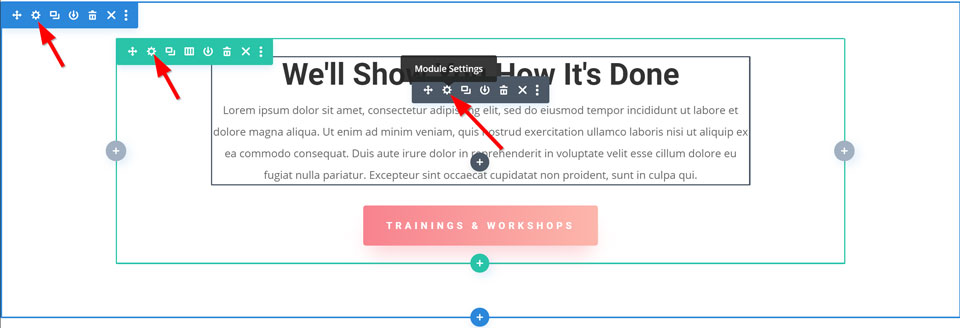
Click on the cogwheel icon to open the settings. The following example shows the settings of a text module:
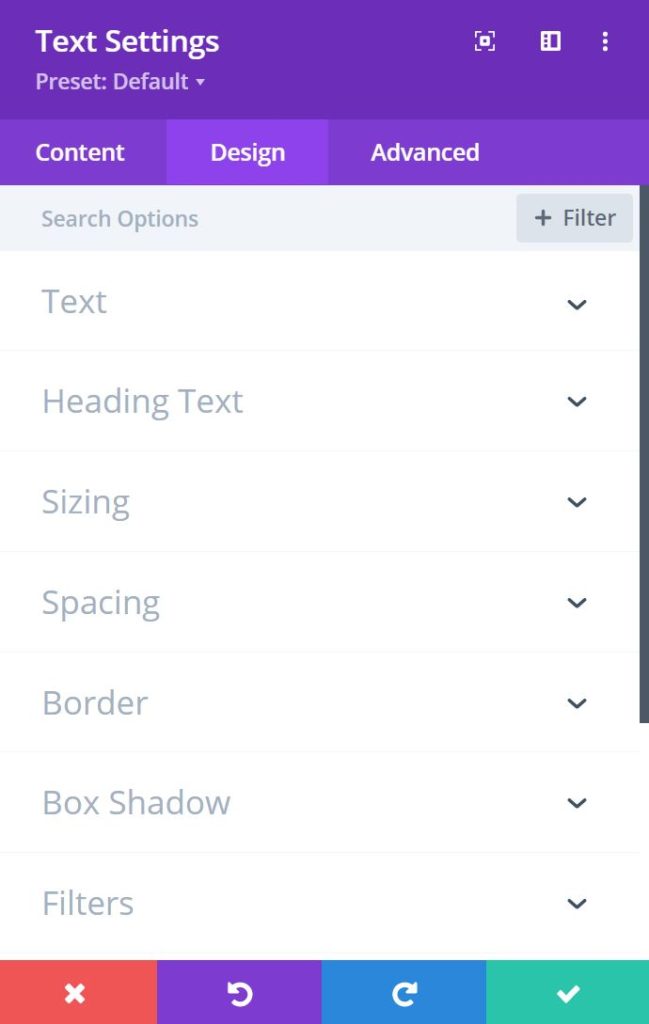
The individual setting options are always organized in 3 different tabs:
1. Content
In this area you manage all the content of an element, for example: Texts, background images, links, column structure etc.
2. Design
This is the area where you manage different design settings. Here you can set all design parameters just as font type and size, text color, spacing, shadows, borders and animations.
3. Advanced
In this section, as the name suggests, you can make advanced settings, such as CSS adjustments, assigning individual classes and IDs or scroll effects.
This tab is mainly suited for advanced users who want to customize Divi beyond Divi’s settings options.
With the Visual Builder, you can now build and customize the individual pages of your website one by one.
The cross-page settings of your website like header, footer, global fonts and colors etc. are customized with the Divi Theme Customizer. I will show you how to do this in the last step of this Divi tutorial.
Step #10: Making global theme settings with Divi Theme Customizer
With the Divi Theme Customizer you can set the global look of your website.
For example, you can specify how you want your main navigation or footer to look, what base font you want to use on your website, what colors you want your links to have, what you want your buttons to look like, and many more.
So, the Theme Customizer helps you to create a consistent look for your website and gives you the possibility to manage global website settings at one central point of the system.
You can access the Theme Customizer from the WordPress menu via Divi > Theme Customizer.

The Theme Customizer is divided into two sections:
- The Customizer menu (on the left). Here you can manage the individual settings for your website.
- The preview area (on the right). Here you can see a real-time preview of the settings you have just made. Like this, you can design your website visually in the browser.

To explain all individual settings in depth would go beyond the scope of this blog article, because there are about 500 options.
You can simply go through the individual tabs one by one yourself to get an overview of the possibilities you have in the Theme Customizer settings.
After that you can start customizing your website and making your individual settings. Of course, you can also always come back to the settings if you want to change something later on.
Those were the 10 steps to building your own Divi website.
Building your own Divi website is not difficult.
If you know which steps are necessary from the beginning and how to proceed, it is possible to get there pretty quickly.
I hope I could save you some headaches with this Divi tutorial and help you to take the first steps towards your own Divi website.
If this Divi tutorial helped you, I’m happy if you leave me a comment.
In case you have any questions, feel free to write me in the comments as well.
And now good luck building your Divi website!